Im calling this 2.5 because our original paper plan quickly showed itself to have some problems.
 Here is how we are constructing Thermal Bin 2.5
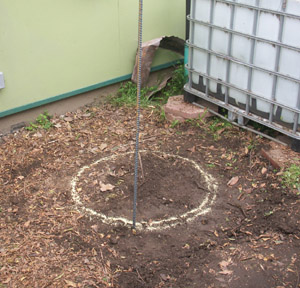
We measured and marked off where we wanted to build. We drove a small dowel into the middle of our location and used a string, funnel and some ancient couscous from the back of our cupboard to mark a radius. Then we laid hardware cloth down. I didnt want to risk critters nesting in our pile. We cut a 20' 5/8" rebar into 3 equal lengths and we pounded them into the ground around a 3' radius leaving just under 4' of rebar above ground. I wanted to use metal so that the poles wouldnt join the biomas in the decomposition process. Here is the first rebar going in. You cant see the hardware cloth on the ground.
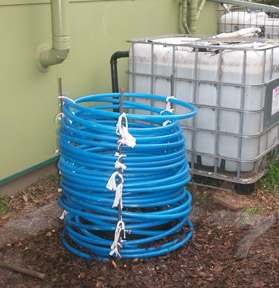
 We wound about 200' of 1" PEX tubing around inside the rebar. The PEX is very stiff and makes a loop on its own. We had a hard time with this part but cant really see a way to simplify it. It worked best when someone walked around the outside with the large coil of PEX and a second person stood in the middle laying and tying the coils. PEX wont twist so laying it correctly is important. 2" strips of t-shirt are used to fasten the PEX to the rebar at intervals.
We dropped our anaerobic digester into the middle. I didnt want to wind around the AD because I was afraid of bumping the spigot and causing it to leak down the road which would be a disaster. We didnt want the AD to sink down as the compost decomposed, so we set it on an old racing tire we found along the road.  This provided a stable base and a thermal break between the AD and the ground. We will do another post about building the AD.
For the front we used what appeared to be the bottom of a child's bed frame I had bought at the salvage yard to grow sweet peas on last year. We put this across the front to firmly hold back the business side of the bin so we could access the AD spigot. In the future we can remove it to empty the pile once its finished composting. The front two poles hold up bed frame. We took 4 additional tree poles and pounded them into the ground in around a 5' radius. We then ran more hardware cloth around the inside of the poles, fastening with staples and used a separate piece of hardware cloth to line the bed frame. Again, we didnt want to risk harboring critters and hoped that this would help us control the shape of our pile and make the most of our limited space.
Part III, filling the pile and initial data.
- Log in to post comments